Local n8n Deployment with Docker Desktop: A Step-by-Step Guide
What is n8n?
n8n is an open-source workflow automation platform that allows you to create, manage, and execute complex automations through a visual interface. As a robust no-code/low-code tool, its core advantages include:
- Node-based Programming: Build workflows by dragging and connecting functional nodes—no extensive coding required.
- Extensive Integrations: Connect 200+ popular apps and services like Airtable, Google Sheets, Slack, GitHub, and more.
- Self-hosted Deployment: Unlike many SaaS-only tools, n8n can be fully self-hosted, ensuring complete data privacy and security.
- Infinite Extensibility: Supports custom node development, allowing you to integrate almost any system or API.
- Fair-code License: Uses a sustainable open-source model that balances code transparency with project growth.
Deploying n8n Locally with Docker
Before we dive into the steps, let’s look at why Docker is the preferred method for deploying n8n:
- Environment Isolation: Docker containers provide an isolated runtime, preventing conflicts with your host system’s dependencies.
- Simplified Setup: No need to manually install Node.js or databases; a single command spins up the entire environment.
- Version Management: Easily control and upgrade n8n versions with precision.
- Cross-platform Consistency: Whether on Windows, macOS, or Linux, Docker ensures a uniform experience.
- Ideal for Testing: Local deployment is perfect for rapid iteration and workflow validation.
- Limitations: Note that local n8n instances cannot be reached by public webhooks without additional tunneling (like ngrok or Cloudflare Tunnels).
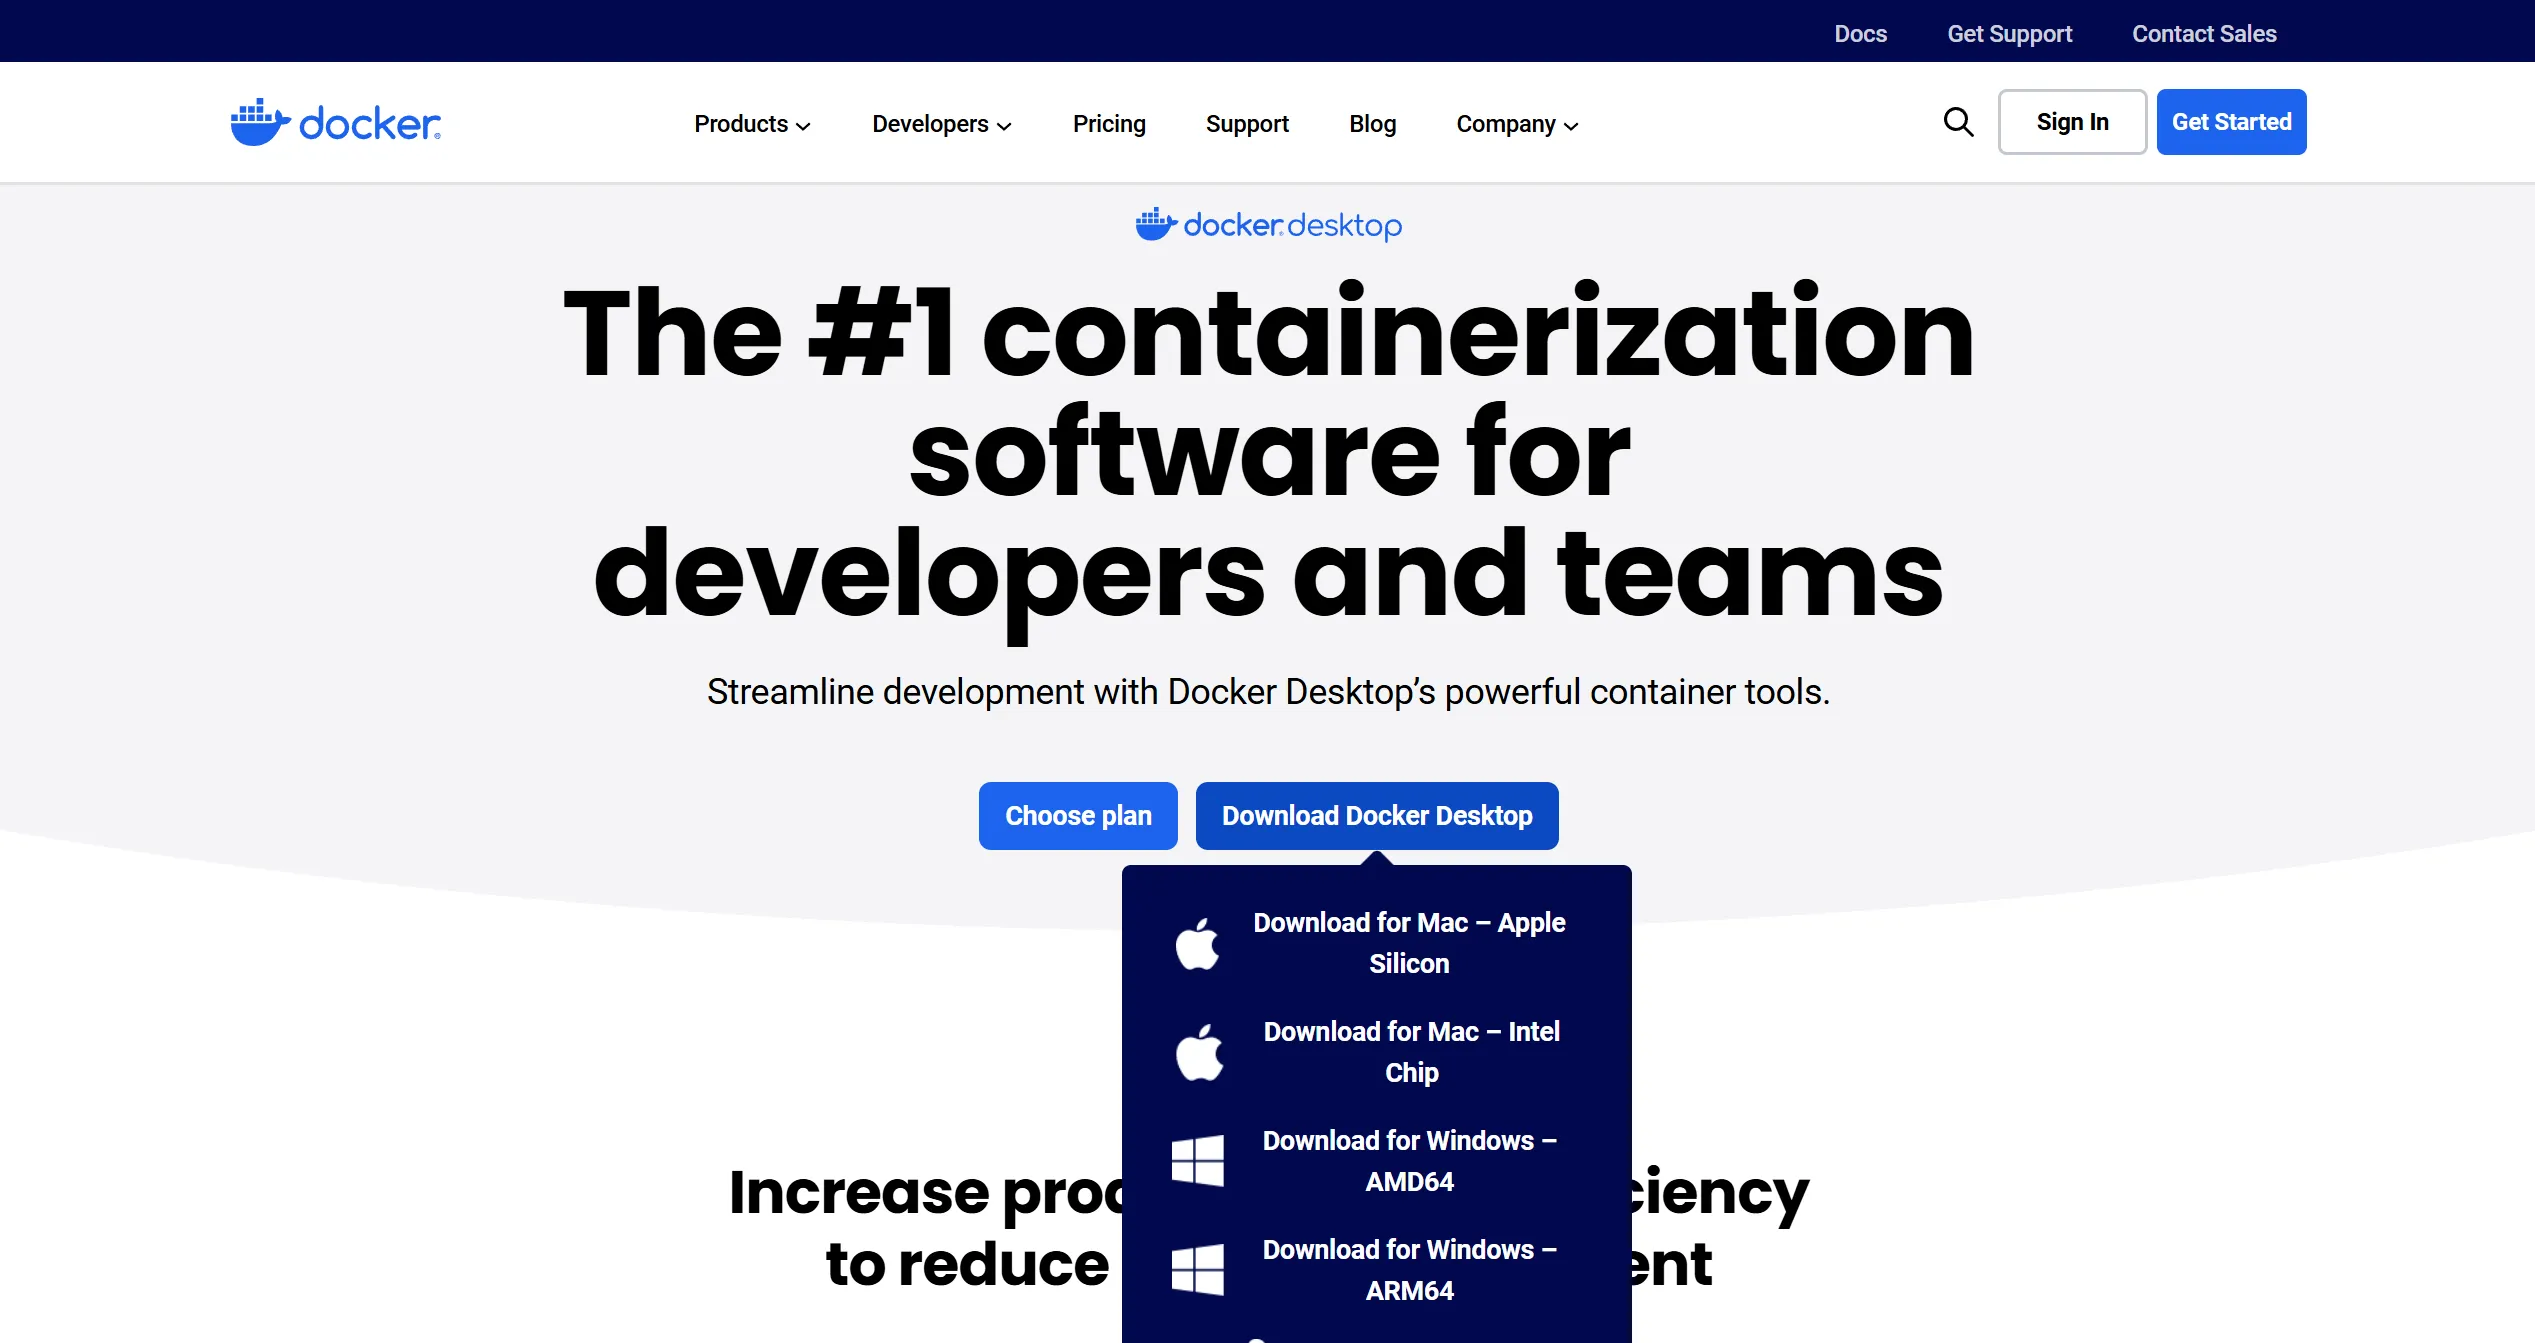
1. Install Docker Desktop
Start by downloading Docker Desktop for your specific operating system and complete the installation.
2. Pull the n8n Image
Open Docker Desktop, search for “n8n” in the global search bar, and click the Pull button to download the official image.
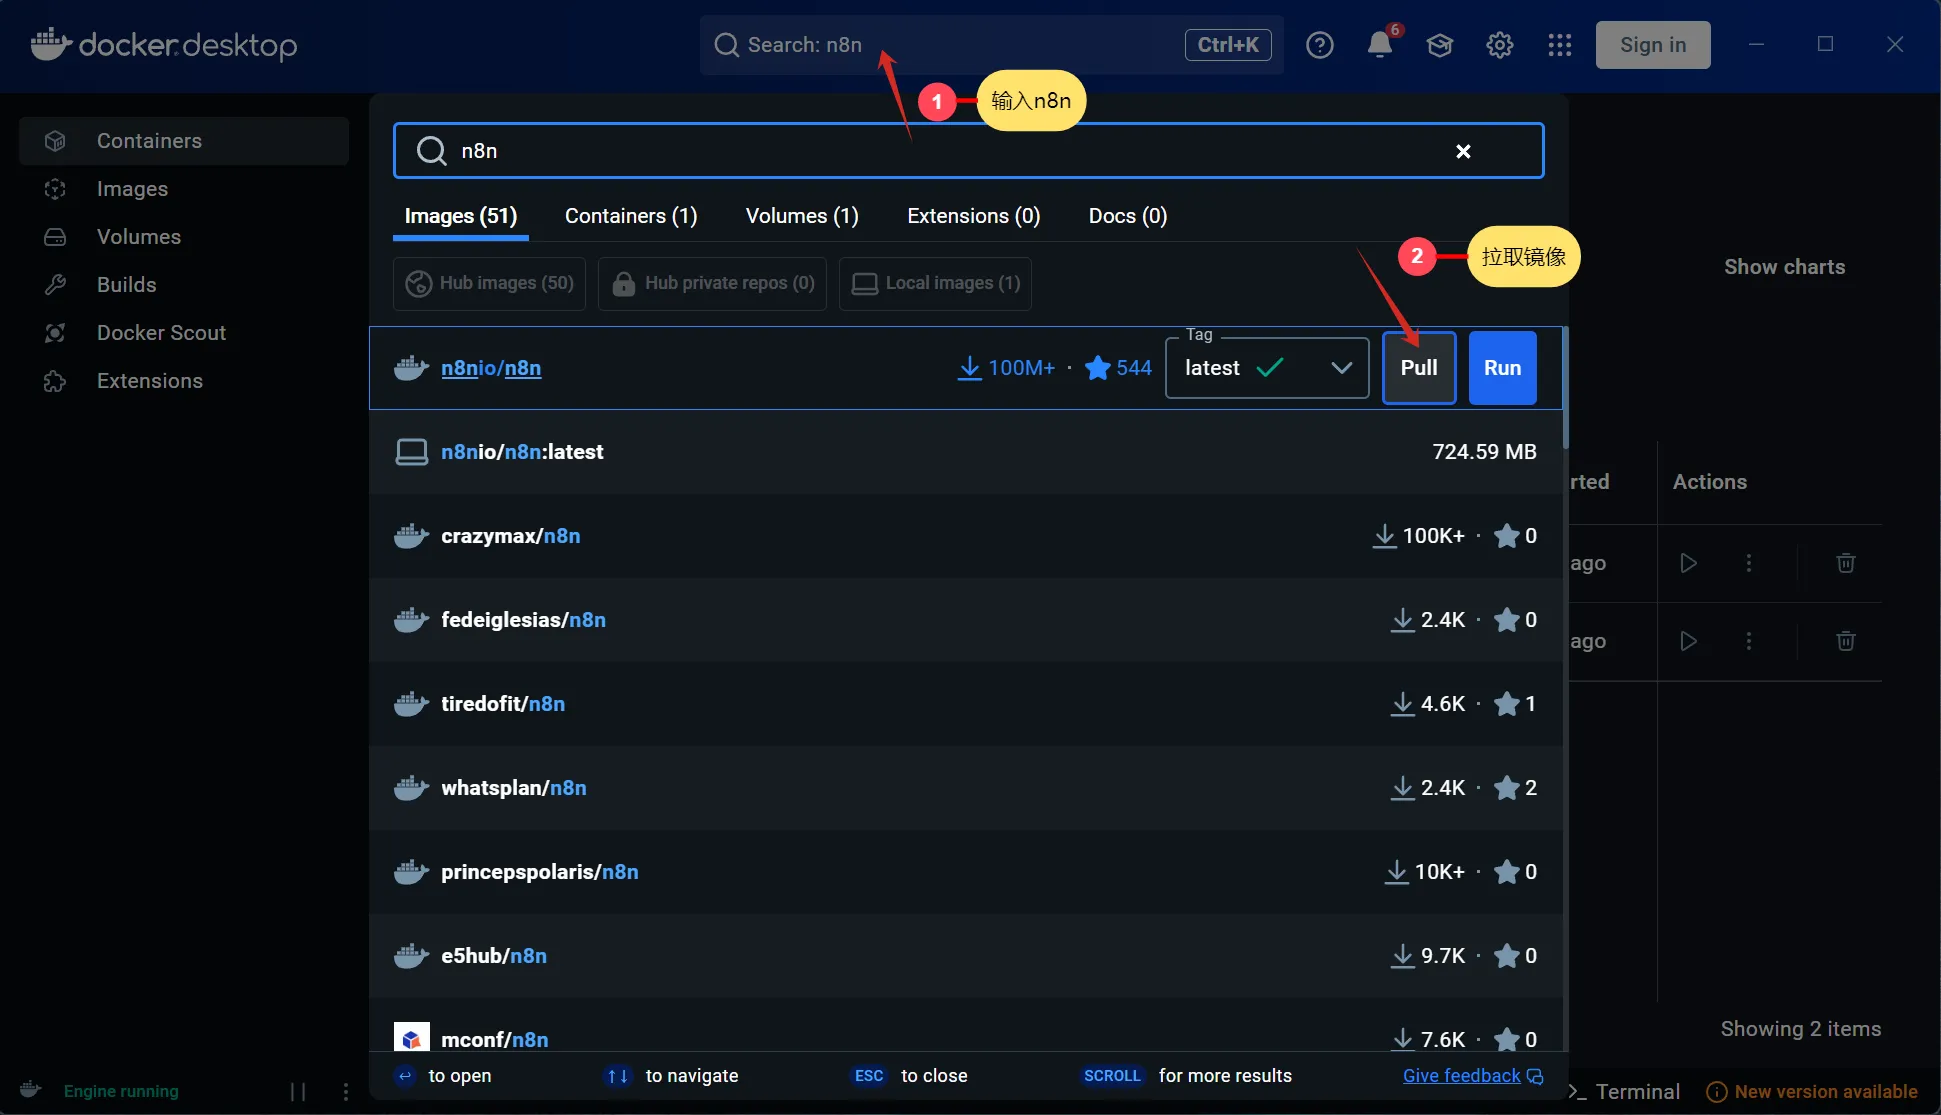
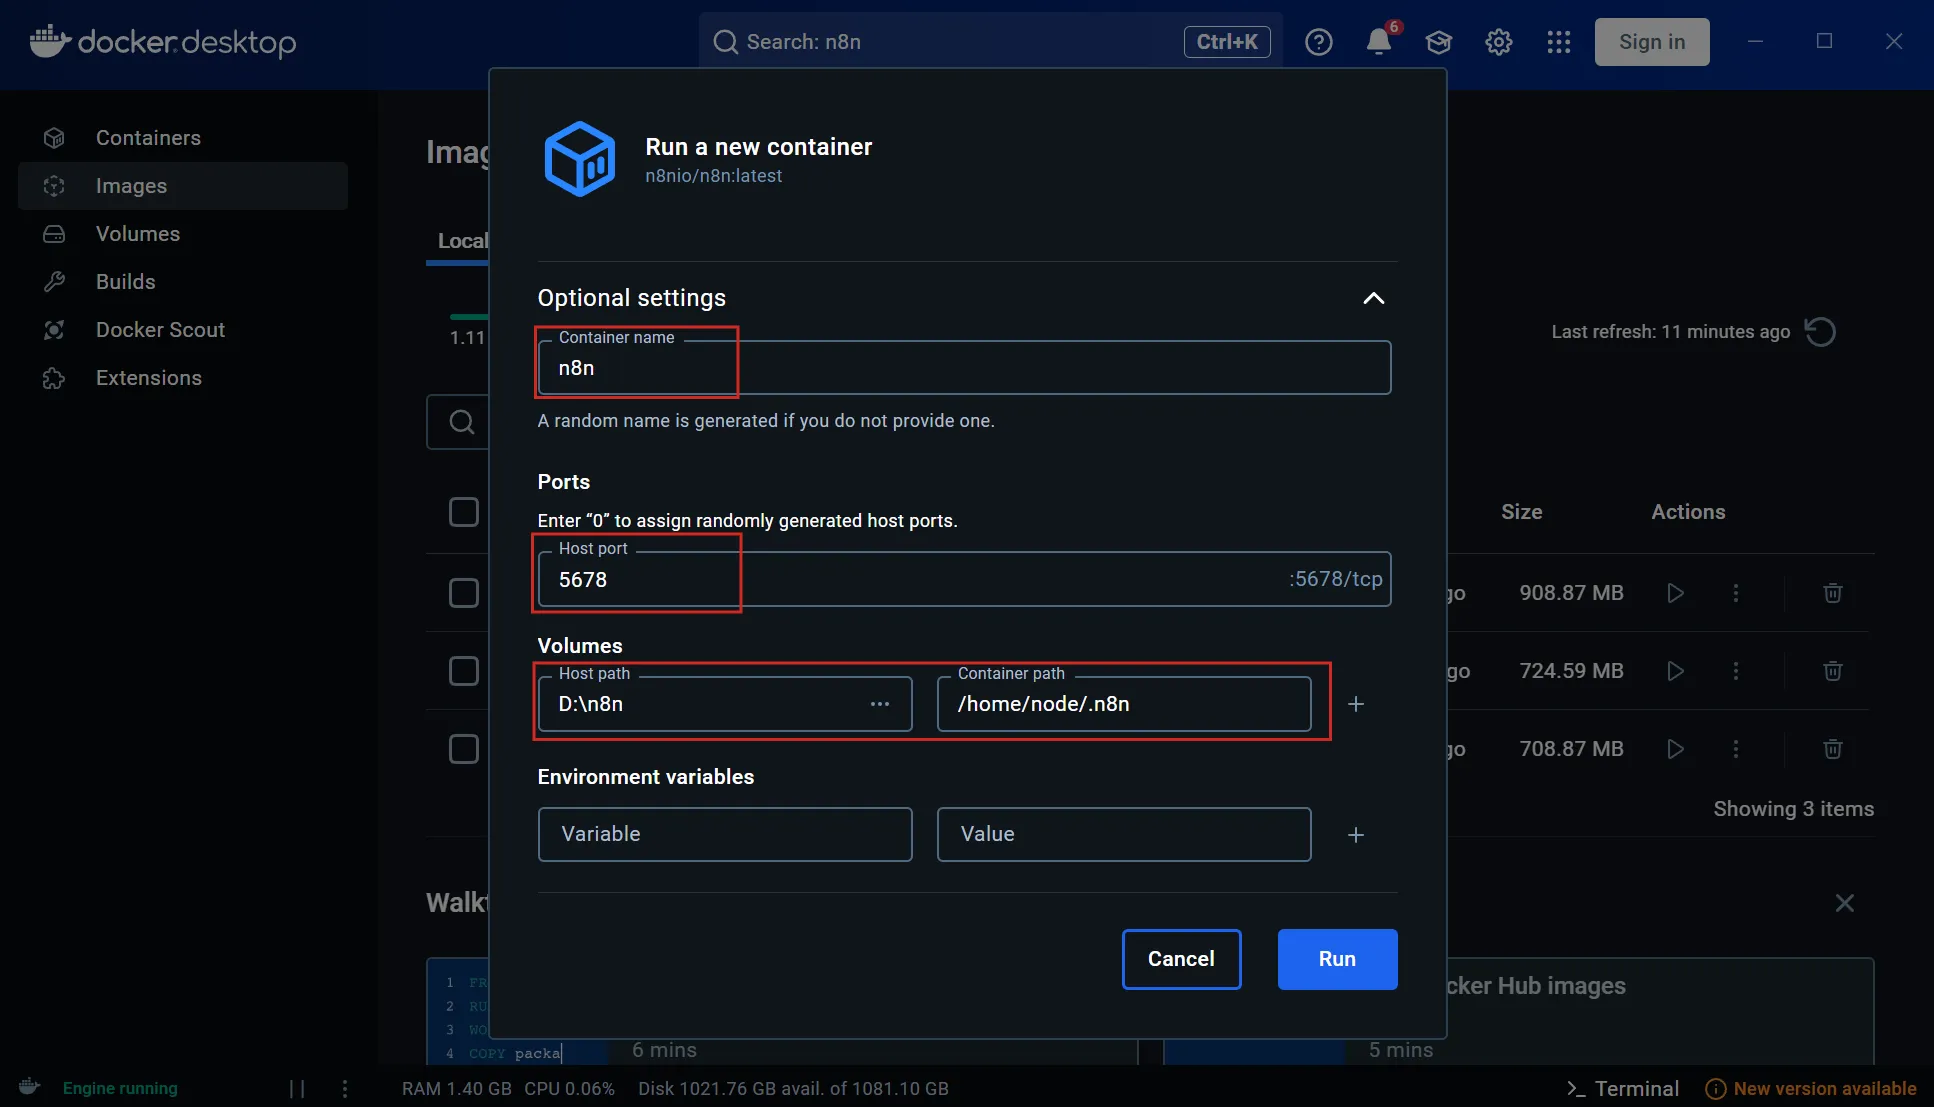
3. Configure the n8n Container
Once downloaded, locate the n8n image in the Images tab. Click the Run icon to start a new container. You will need to configure a few basic settings:
- Container name (e.g.,
n8n-local) - Host Port (e.g.,
5678) - Volumes (Mount paths)
- Important: Make sure to map a persistent volume for the n8n data directory. Docker is ephemeral by default; without volume mapping, your workflows, credentials, and data will be lost if the container is updated or deleted.
- Click Run to launch your instance.
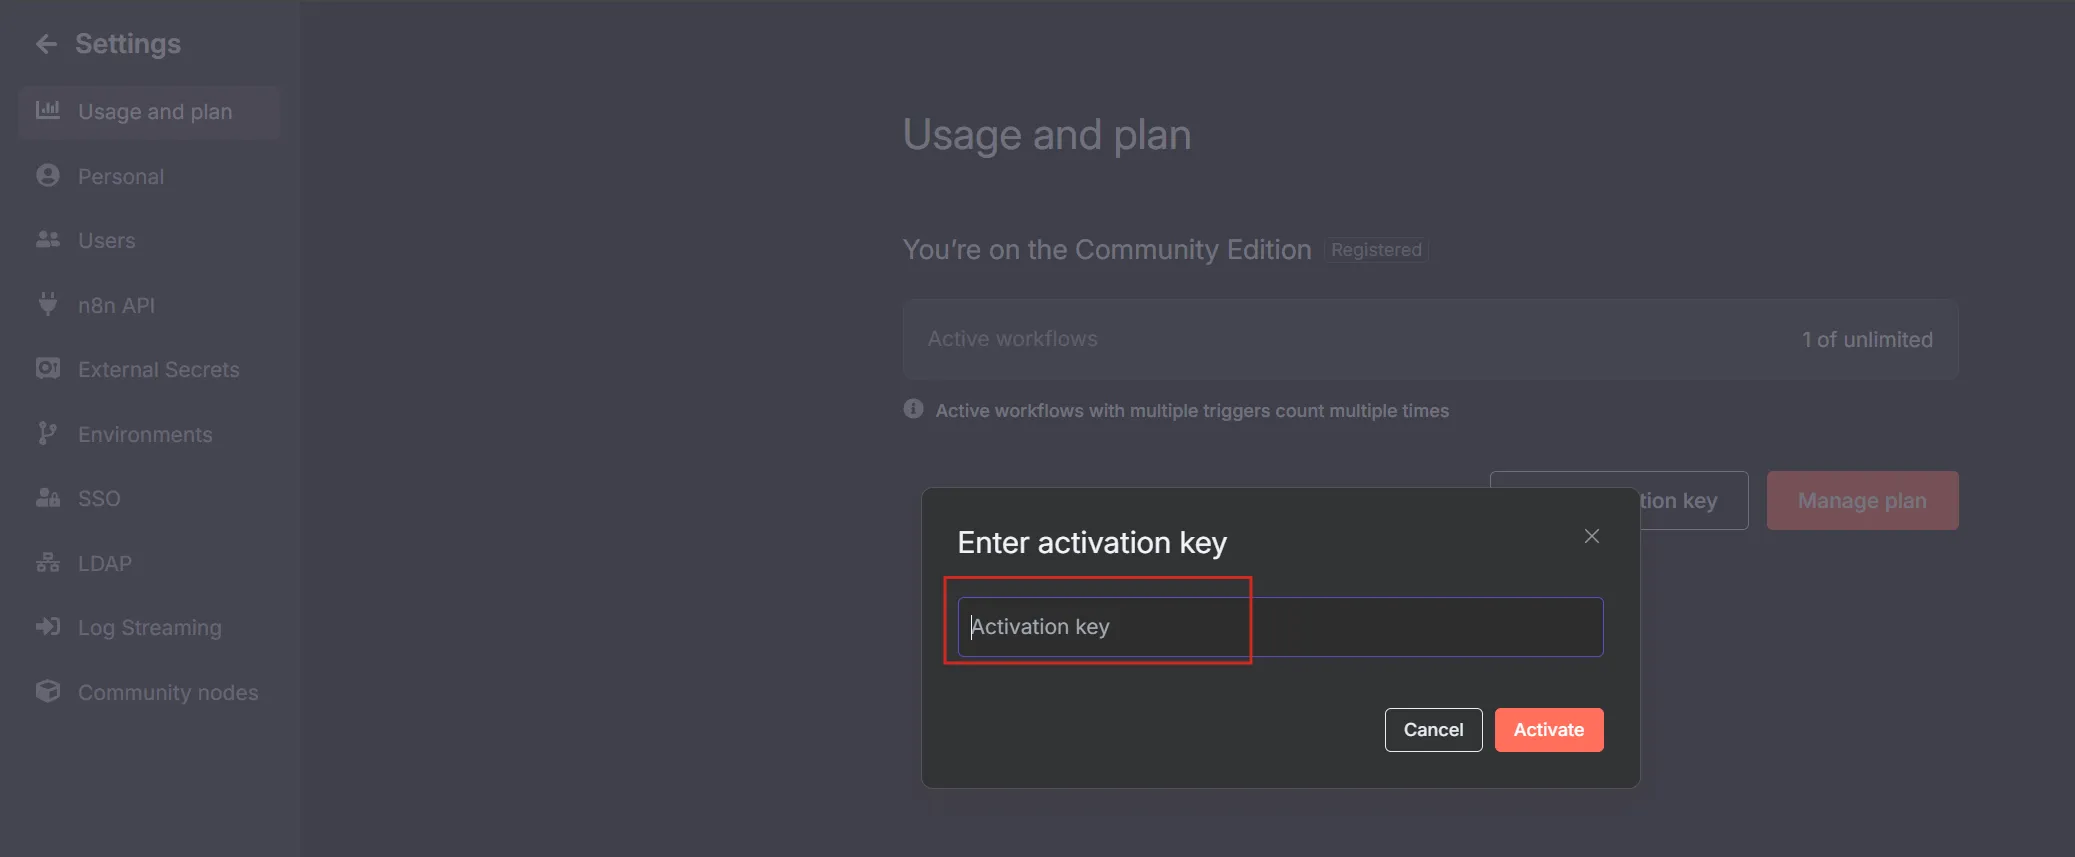
Activating Your n8n Account
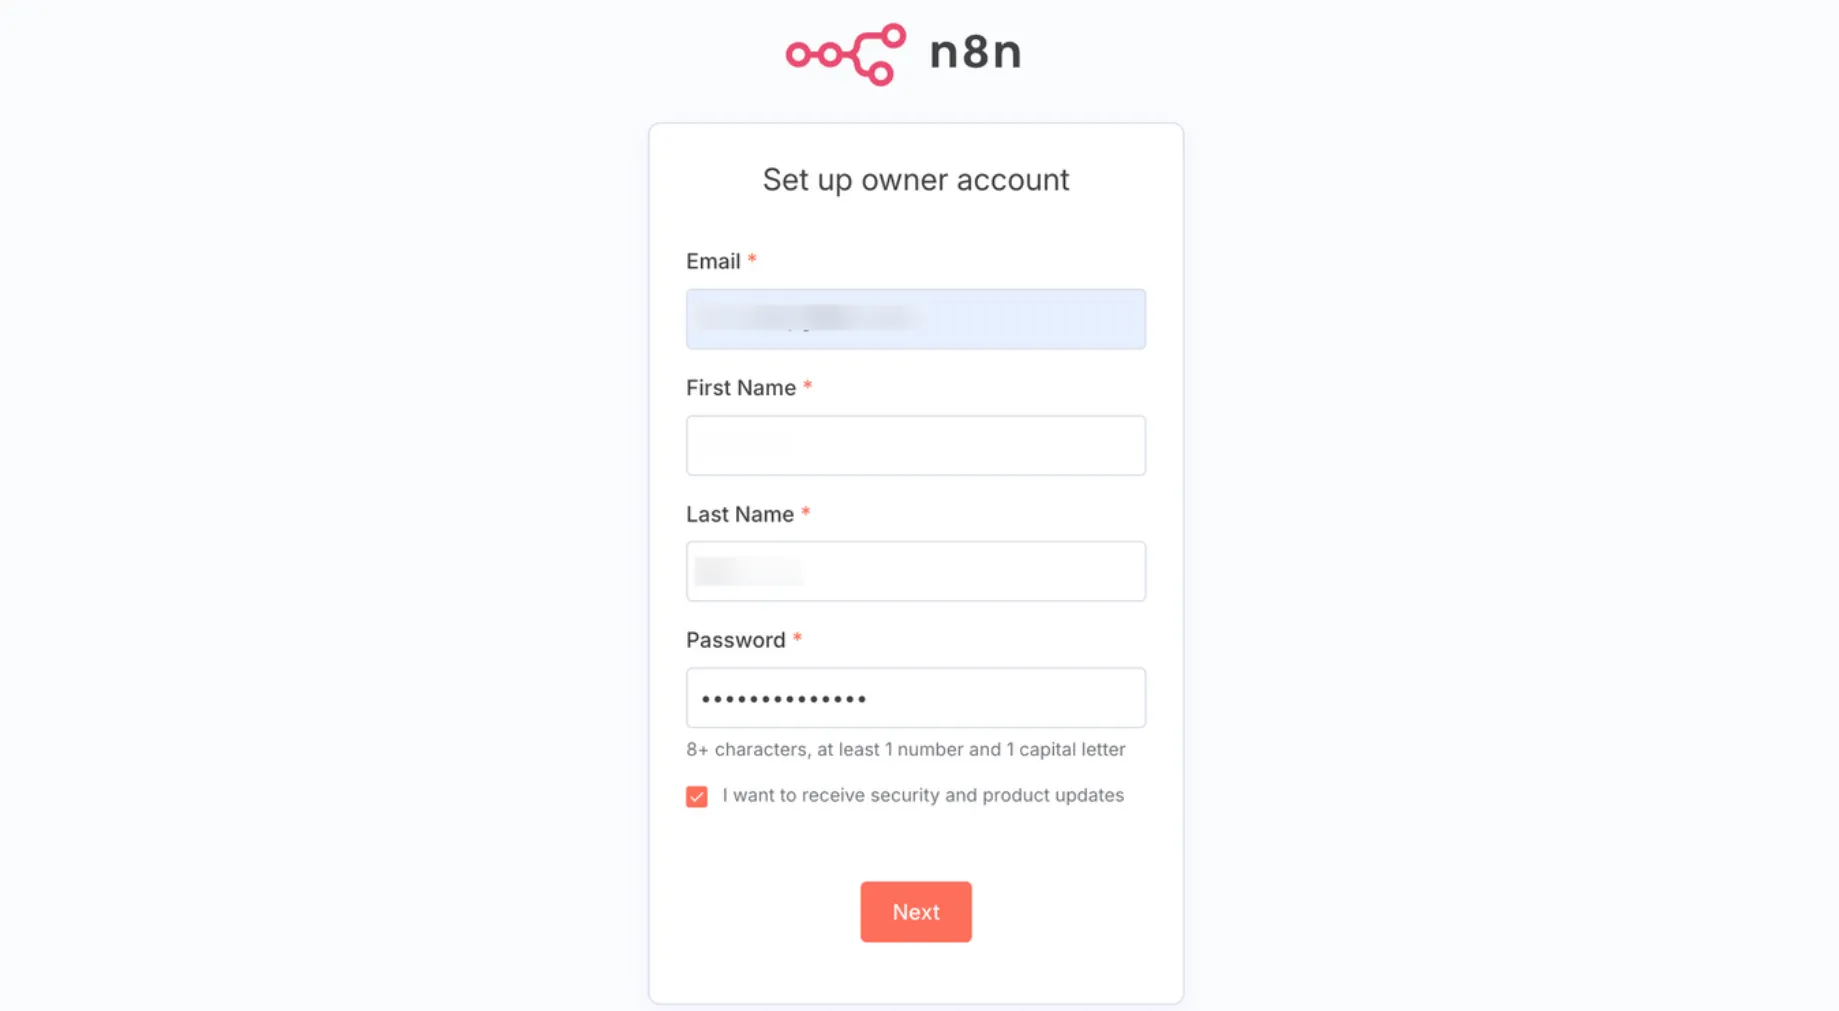
Upon first launch, you’ll be greeted by the account registration screen. Fill in your details to create your local admin account.
Once logged in, click the three dots in the bottom-left corner to access Settings and ensure your account is activated.
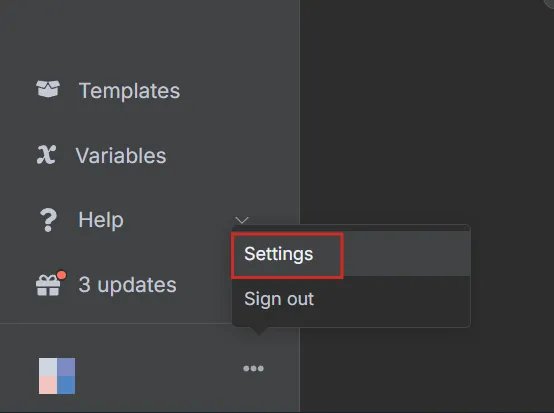
Follow the on-screen prompts to receive your activation key via email, unlock the full capabilities of your local n8n environment, and start building your first workflow.